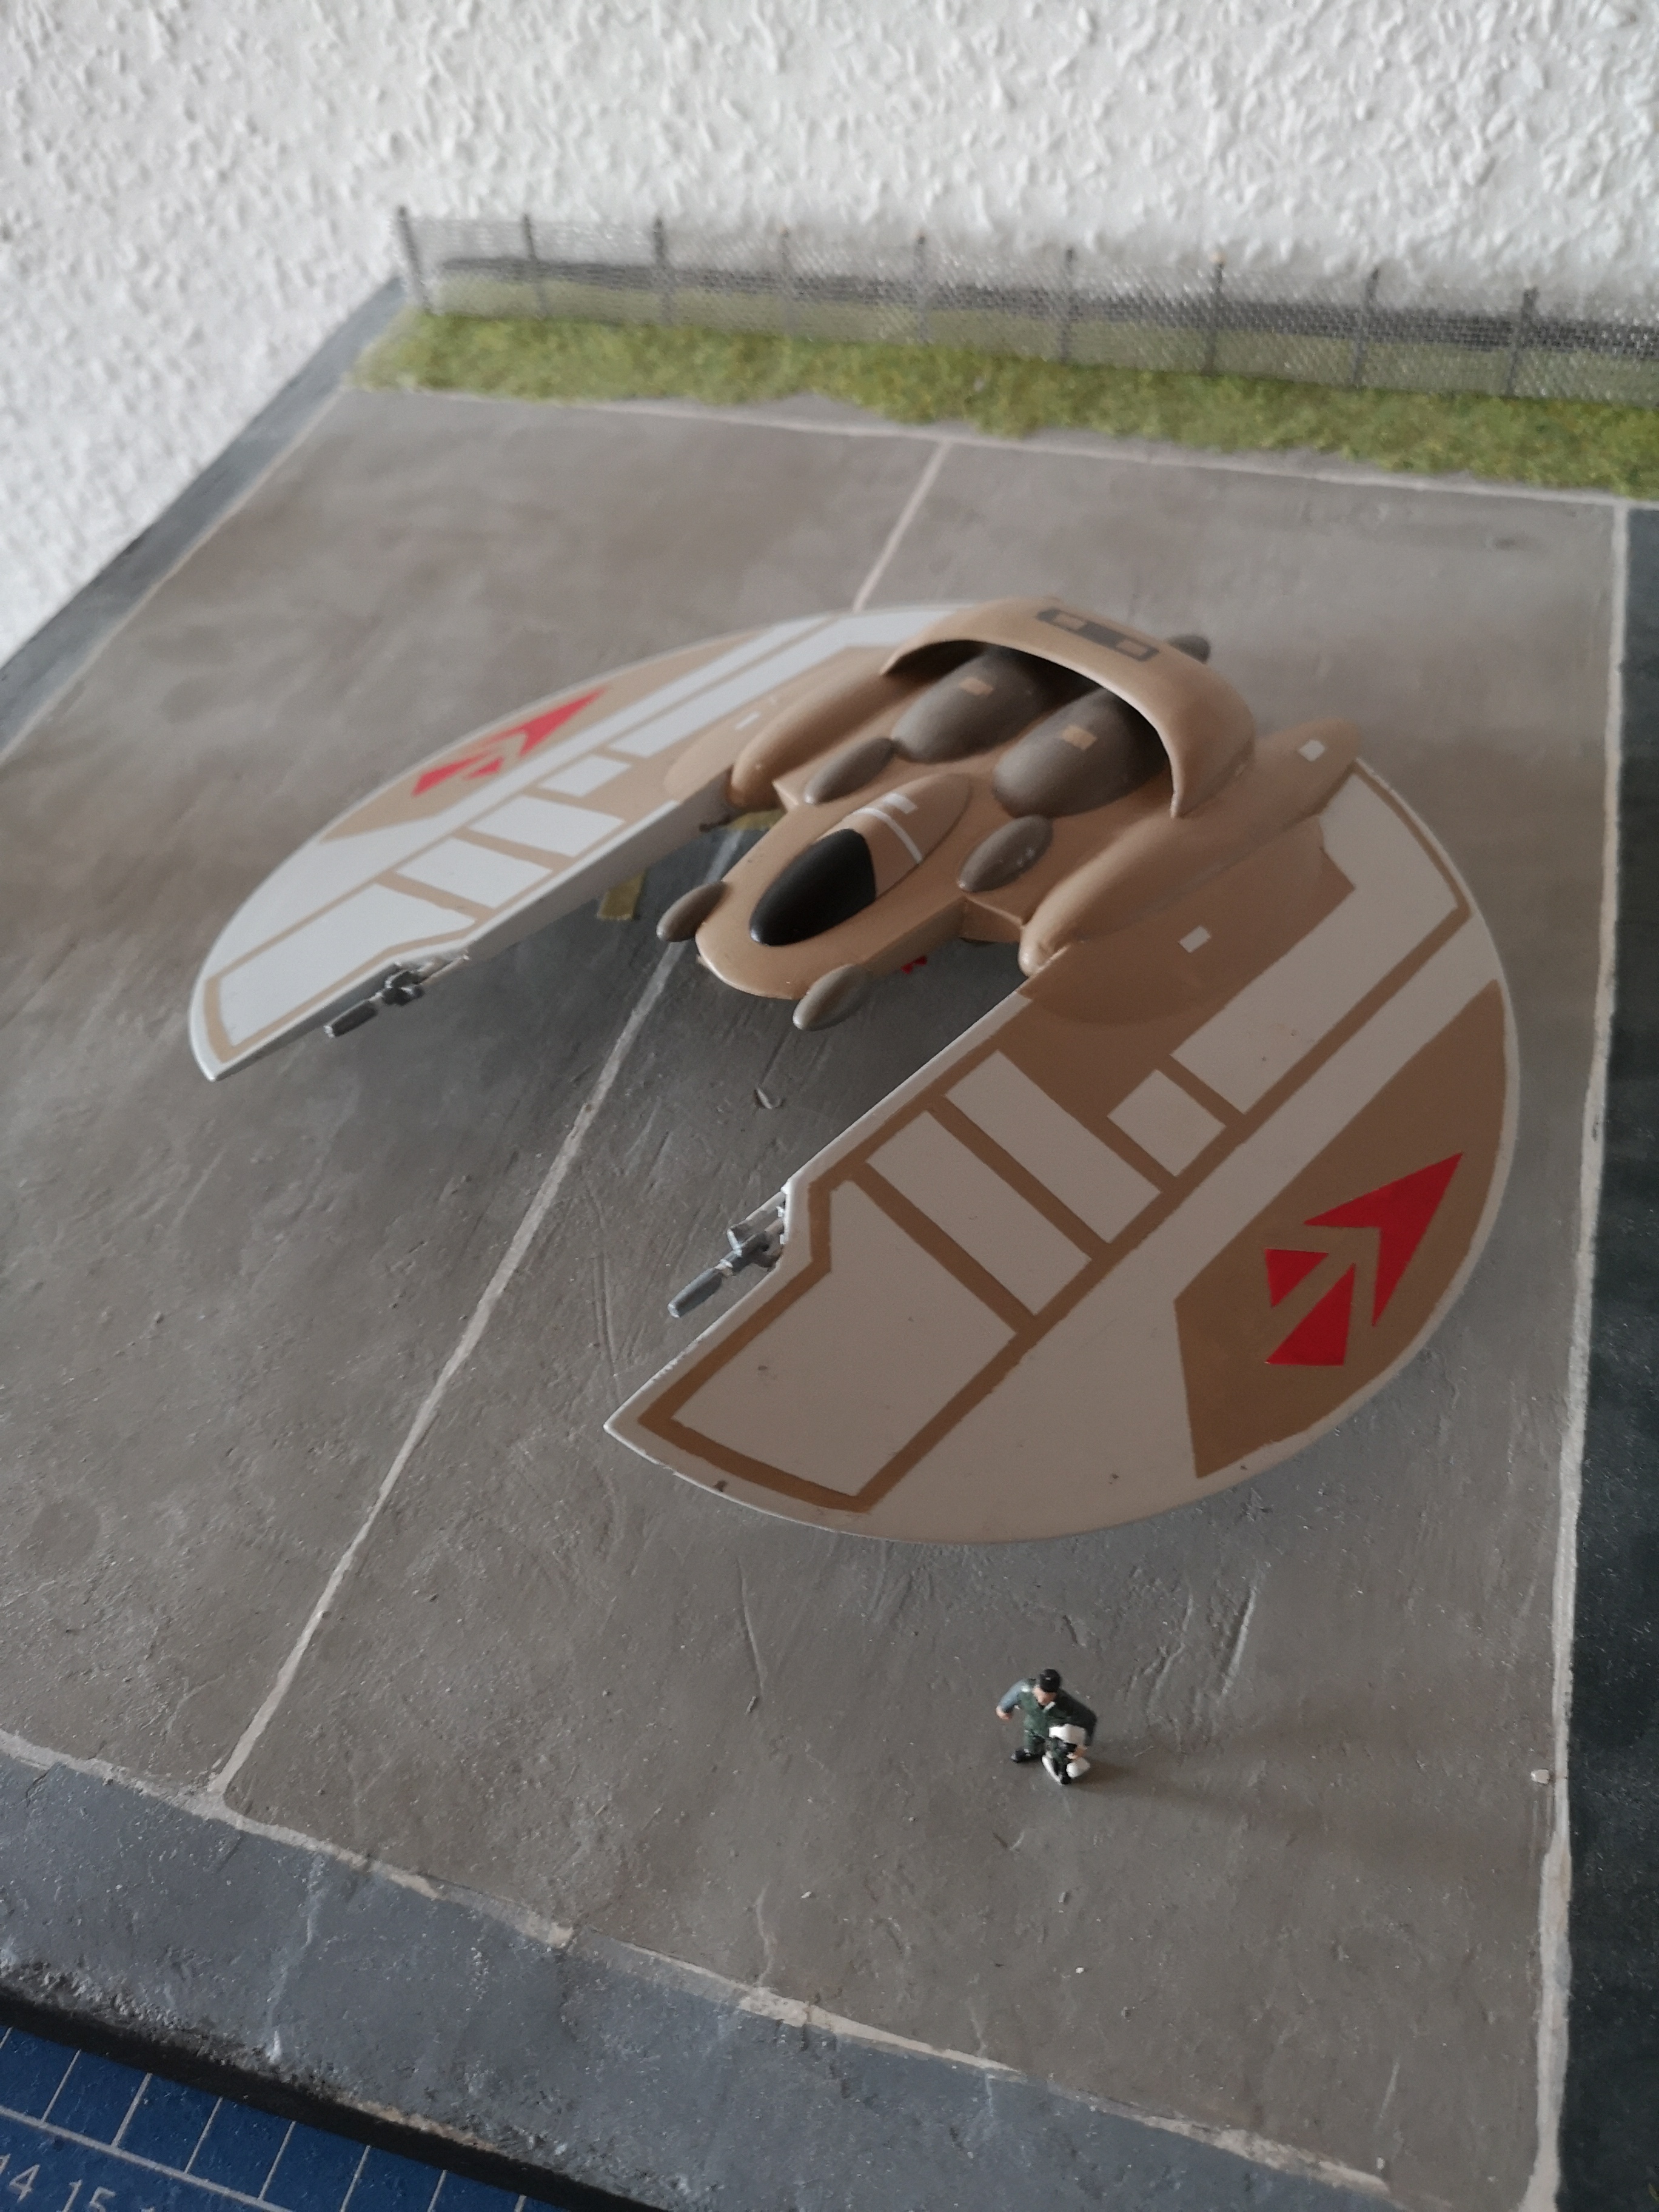
Flying Pancake. Kilrathi Dralthi Mk7.
My version with a simple landing gear. Hand-painted.
I just finished building it, even though I realized during construction that the spaceship is still a bit too small for the pilot.
Next time I'll make him a bit bigger. Trial and error.

IMG_20260218_080228.jpg
 
If I remember correctly, the Kilrathi are supposed to be between 2 meters and 2.5 meters tall.

The divisions on the model for printing are okay. Reassembling it also worked. Successful test construction makes scaling easy.
 
Update from the workshop.
Cpt. Streets inspired me when I was painting my Tarsus.
The final rollout coming soon.
Here’s a little preview.
 

Attachments

  • x1.gif
    x1.gif
    648 KB · Views: 97
Start a new game.
My version of the Tarsus is finished.
The model is a mix of free models from Thingiverse (created by Djfx and Astrofosil) and the original 3D model from the game.
The engine lighting was inspired by Captain Streets here on the forum.
The rusty bucket was my first major 3D printing project.

Below is some information about my Douglas Astrospace ST-2426 model.
“ST” stands for “Super Tarsus” because it features more details than the original in-game model, and 2426 refers to the start and end years of this project.
A main switch allows you to set three modes: Off, On, and Automatic.
On: continuous power
Automatic: when it gets dark, the model turns on automatically and turns off again after X amount of time.
There is cockpit lighting and landing lights, as well as flickering LEDs in the engines.
The radar is rotated by a small gear motor.
The engines and radar can be switched on separately from the lighting via two hidden switches.
A total of over 6 meters of cable is installed in the spaceship, which is approximately 40 cm long.
Attachable parts such as cannons, launchers, tractor beams, radar, and scanners can be swapped out for other versions. The interfaces are connected by small magnets. The cockpit roof and the electrical maintenance hatch on the left side of the spaceship also have magnets.
The front covers of the two main engines can be removed to install a different power upgrade.
It is possible to equip the spaceship so that the external changes are visible, just like with the Ship Dealer in the game.

Let’s move on to the game’s unsolved mysteries.
Some items you can buy in the game are no longer visible after purchase. The proportions between various parts also don’t match up.
How do the characters get inside the objects? This question was almost a deal-breaker because I couldn’t think of a plausible way for the pilot to get into the cockpit. This fact kept me occupied for several days. The issue was somewhat resolved by the loading hatch at the rear of the spaceship.
My interpretations of the individual proportions look appropriate to me at the moment.

Enough with the text—let the pictures speak for themselves.
Tarsus without equpment
WCP_Tarusus_S0.jpg


Tarsus at game start
WCP_Tarusus_S1_2.jpg
WCP_Tarusus_S1.jpg
WCP_Tarusus_S1_3.jpg
WCP_Tarusus_S1_5.jpg
WCP_Tarusus_S1_6.jpg
WCP_Tarusus_S1_4.jpg


Tarsus with full equipment
WCP_Tarusus_S3.jpg
WCP_Tarusus_S3_Carnopy.jpg


Tarsus Cockpit
WCP_Tarusus_S0_Cockpit.jpg
WCP_Tarusus_S0_Canopy.jpg


workbench and control box
WCP_Tarusus_S3_workbench.jpg
WCP_Tarusus_S3_hatch.jpg


equipment
WCP_Stuff_2.jpg


Repair Droid with movable arms and fingers
WCP_Droid.jpg


gifs
VID_20260521_200130.gif

VID_20260520_210950.gif

VID_20260521_213837.gif
 
Last edited:
Start a new game.
My version of the Tarsus is finished.
The model is a mix of free models from Thingiverse (created by Djfx and Astrofosil) and the original 3D model from the game.
The engine lighting was inspired by Captain Streets here on the forum.
The rusty bucket was my first major 3D printing project.

Below is some information about my Douglas Astrospace ST-2426 model.
“ST” stands for “Super Tarsus” because it features more details than the original in-game model, and 2426 refers to the start and end years of this project.
A main switch allows you to set three modes: Off, On, and Automatic.
On: continuous power
Automatic: when it gets dark, the model turns on automatically and turns off again after X amount of time.
There is cockpit lighting and landing lights, as well as flickering LEDs in the engines.
The radar is rotated by a small gear motor.
The engines and radar can be switched on separately from the lighting via two hidden switches.
A total of over 6 meters of cable is installed in the spaceship, which is approximately 40 cm long.
Attachable parts such as cannons, launchers, tractor beams, radar, and scanners can be swapped out for other versions. The interfaces are connected by small magnets. The cockpit roof and the electrical maintenance hatch on the left side of the spaceship also have magnets.
The front covers of the two main engines can be removed to install a different power upgrade.
It is possible to equip the spaceship so that the external changes are visible, just like with the Ship Dealer in the game.

Let’s move on to the game’s unsolved mysteries.
Some items you can buy in the game are no longer visible after purchase. The proportions between various parts also don’t match up.
How do the characters get inside the objects? This question was almost a deal-breaker because I couldn’t think of a plausible way for the pilot to get into the cockpit. This fact kept me occupied for several days. The issue was somewhat resolved by the loading hatch at the rear of the spaceship.
My interpretations of the individual proportions look appropriate to me at the moment.

Enough with the text—let the pictures speak for themselves.
Tarsus without equpment
View attachment 15078

Tarsus at game start
View attachment 15079 View attachment 15080 View attachment 15081 View attachment 15082 View attachment 15083 View attachment 15084

Tarsus with full equipment
View attachment 15085 View attachment 15086

Tarsus Cockpit
View attachment 15087 View attachment 15088

workbench and control box
View attachment 15089 View attachment 15090

equipment
View attachment 15093

Repair Droid with movable arms and fingers
View attachment 15094

gifs
View attachment 15095
View attachment 15096
View attachment 15097
This is beyond amazing. What a fantastic piece of work. The model itself would have been super impressive, but the diorama and accessories just take it to a completely different level. Simply outstanding!
 
Hi Guys.
Could anyone please provide me Klavs' 3D-Model of the Arrow-V?
First of, I'd like to print it and secondly I would like to use it on a project of my own.
Would be very kind of you.
Thank you very much in advance.
 
First of all, big thanks to @rap1983 for the explanation. Now I know what @Whiplash meant.
But getting back to my main question: Does anyone in the community have Klavs' 3D model of the WC-3 Arrow?
Would they be willing to share it with me?
 
Last edited:
Start a new game.
My version of the Tarsus is finished.
The model is a mix of free models from Thingiverse (created by Djfx and Astrofosil) and the original 3D model from the game.
The engine lighting was inspired by Captain Streets here on the forum.
The rusty bucket was my first major 3D printing project.

Below is some information about my Douglas Astrospace ST-2426 model.
“ST” stands for “Super Tarsus” because it features more details than the original in-game model, and 2426 refers to the start and end years of this project.
A main switch allows you to set three modes: Off, On, and Automatic.
On: continuous power
Automatic: when it gets dark, the model turns on automatically and turns off again after X amount of time.
There is cockpit lighting and landing lights, as well as flickering LEDs in the engines.
The radar is rotated by a small gear motor.
The engines and radar can be switched on separately from the lighting via two hidden switches.
A total of over 6 meters of cable is installed in the spaceship, which is approximately 40 cm long.
Attachable parts such as cannons, launchers, tractor beams, radar, and scanners can be swapped out for other versions. The interfaces are connected by small magnets. The cockpit roof and the electrical maintenance hatch on the left side of the spaceship also have magnets.
The front covers of the two main engines can be removed to install a different power upgrade.
It is possible to equip the spaceship so that the external changes are visible, just like with the Ship Dealer in the game.

Let’s move on to the game’s unsolved mysteries.
Some items you can buy in the game are no longer visible after purchase. The proportions between various parts also don’t match up.
How do the characters get inside the objects? This question was almost a deal-breaker because I couldn’t think of a plausible way for the pilot to get into the cockpit. This fact kept me occupied for several days. The issue was somewhat resolved by the loading hatch at the rear of the spaceship.
My interpretations of the individual proportions look appropriate to me at the moment.

Enough with the text—let the pictures speak for themselves.
Tarsus without equpment
View attachment 15078

Tarsus at game start
View attachment 15079 View attachment 15080 View attachment 15081 View attachment 15082 View attachment 15083 View attachment 15084

Tarsus with full equipment
View attachment 15085 View attachment 15086

Tarsus Cockpit
View attachment 15087 View attachment 15088

workbench and control box
View attachment 15089 View attachment 15090

equipment
View attachment 15093

Repair Droid with movable arms and fingers
View attachment 15094

gifs
View attachment 15095
View attachment 15096
View attachment 15097
Great work, especially the GIFs 🔥 🔥
 
Thank you so much for your comments and likes.
Your tips, ideas, and discussions were also very helpful and had a significant impact on this project.
If you have any questions about the designs or the build, I’d be happy to answer them.

The game is just getting started, and I’m excited to see where this journey takes us.
 
Last edited:
Here is my prototype of the F-38 Talon.
I used the original 3D model from the game as a basis.
There are several posts about the Talon on the forum with inspiring images.
Using these images as a reference, I drew a landing gear and added it to the model. I replaced the cannons with the Mass Driver model, which I also created for the Tarsus. I didn’t replace the missiles with the ones from Shipdealer, since they would have been much too short otherwise.

The images in the forum show the area behind the cockpit extending into the fuselage differently than in the original game model.
Two test prints were necessary to get the scaling right.
The landing gear model is based on an F-14 Tomcat. I drew the landing gear doors myself. The fuselage was printed in two parts and sanded down after assembly. All other parts were printed separately. The paint scheme is based on the Pirates’ version.

I decided against testing a transparent canopy and cockpit interior for now—maybe I’ll try that when I print it again.
 

Attachments

  • Talon_01.jpg
    Talon_01.jpg
    95.2 KB · Views: 38
  • Talon_02.jpg
    Talon_02.jpg
    237.5 KB · Views: 36
  • Talon_03.jpg
    Talon_03.jpg
    127.5 KB · Views: 34
  • Talon_04.jpg
    Talon_04.jpg
    30.6 KB · Views: 33
  • Talon_05.jpg
    Talon_05.jpg
    79.3 KB · Views: 32
  • Talon_06.jpg
    Talon_06.jpg
    179.7 KB · Views: 23
  • Talon_07.jpg
    Talon_07.jpg
    118.9 KB · Views: 29
  • Talon_08.jpg
    Talon_08.jpg
    33.9 KB · Views: 31
We actually do have another scaling source for the Talon, and again it doesn't actually come from Privateer.

talon.png

This is from Privateer 2. The game also had a spaceman model which I've put alongside it.